How can you use spray paint art to convey specific themes or messages

Many intriguing possibilities await when you research into spray paint art to convey specific themes or messages. Whether you aim to express emotions, tell a story, or shed light on social issues, the vibrant and dynamic nature of spray paint art offers a unique canvas for your creative vision. In this blog post, you will discover tips and techniques on how to effectively incorporate symbolism, color choices, and composition to convey your desired themes or messages through the mesmerizing medium of spray paint art.

Key Takeaways:

  • Choose relevant imagery: Selecting specific images or symbols that align with the themes or messages you want to convey can help communicate your ideas more effectively.
  • Play with colors and techniques: Using a variety of colors, shades, and spray paint techniques can enhance the visual impact of your art and evoke emotions that support your intended theme or message.
  • Add meaningful elements: Incorporating elements such as textures, shapes, or words can add layers of meaning to your spray paint art and deepen the overall message you want to convey.

The Power of Symbolism

To effectively convey specific themes or messages through spray paint art, you can harness the power of symbolism. Symbolism adds depth and complexity to your artwork, allowing viewers to interpret deeper meanings beyond the surface. By using symbols, you can evoke emotions, provoke thoughts, and create a connection with your audience.

Using Colors to Convey Emotions

Colors play a crucial role in setting the tone and evoking emotions in spray paint art. Each color carries its own unique symbolism and can convey different feelings and moods. For example, warm colors like red, orange, and yellow are often associated with energy, passion, and warmth, while cool colors like blue and green evoke calmness, serenity, and tranquility. By strategically choosing colors in your artwork, you can directly influence how viewers interpret and feel about your piece.

Symbolic Imagery in Spray Paint Art

Using symbolic imagery in your spray paint art can add layers of meaning and intrigue to your work. Symbols can be universal, like hearts for love or trees for growth, or they can be more personal and unique to your intended message. Incorporating symbols allows you to communicate abstract concepts in a visual language that resonates with viewers on a subconscious level. Whether you use animals, shapes, or objects, each symbol can enrich your artwork with deeper significance.

The incorporation of symbolic imagery in spray paint art gives you the opportunity to infuse your work with hidden meanings and narratives. These symbols serve as visual cues for viewers to unravel the story behind your artwork and connect with it on a deeper level. By carefully selecting and placing symbolic elements in your piece, you can guide the viewer’s interpretation and create a powerful visual experience.

Social Commentary through Spray Paint Art

You can use spray paint art to convey powerful messages about society and the world around us. By utilizing this medium, you have the ability to draw attention to important issues and provoke thought and discussion among viewers.

Highlighting Environmental Issues

Social commentary through spray paint art can be a potent way to raise awareness about environmental issues. You can create vibrant and striking images that depict the consequences of pollution, deforestation, or climate change. These visual representations can serve as a call to action, urging viewers to take steps towards environmental conservation and sustainability.

Addressing Social Justice Concerns

The use of spray paint art as a tool for addressing social justice concerns is a powerful form of activism. By creating thought-provoking artwork that highlights issues such as inequality, discrimination, or human rights violations, you can shine a light on systemic injustices. Your art has the potential to amplify marginalized voices and challenge the status quo.

The ability of spray paint art to engage audiences and evoke emotions makes it an impactful medium for addressing social justice concerns. Through your art, you can spark conversations, promote empathy, and inspire positive change in society.

Highlighting

Storytelling with Spray Paint

After exploring the art medium in a fusion of category and material in Exploring Art Medium: A Fusion of Category and Material in …, you can now probe the world of storytelling with spray paint art. One way to convey narratives through your art is by creating narrative scenes. By incorporating elements like landscapes, figures, and objects, you can transport your viewers to a different world and immerse them in your story.

Creating Narrative Scenes

With spray paint art, you can easily create intricate narrative scenes that evoke a range of emotions in your audience. Whether you want to tell a tale of adventure, love, or mystery, the vibrant colors and fluid movements of spray paint allow you to bring your story to life on the canvas. You can experiment with different techniques like layering, blending, and masking to add depth and detail to your scenes, making them more immersive and captivating.

Using Character Development in Spray Paint Art

Any compelling story needs well-developed characters to drive the plot forward and engage the audience. In spray paint art, you can use character development to infuse your pieces with personality and meaning. Whether you’re creating heroes, villains, or everyday people, each character you paint can convey a specific emotion or message to the viewer. Through their expressions, poses, and interactions with the environment, you can establish a connection between the audience and the story you’re telling.

Spray paint art offers a unique opportunity to experiment with character development in a visually striking way. By focusing on the details of each character, from their facial expressions to their body language, you can create a sense of depth and complexity in your artwork. You can also use colors, textures, and backgrounds to further enhance the personality and story of each character, making them truly come alive on the canvas.

Abstract Expressionism in Spray Paint Art

For artists looking to convey specific themes or messages through spray paint art, abstract expressionism is a powerful style to explore. This artistic movement emphasizes self-expression, emotion, and individual interpretation, making it perfect for conveying deep emotions and complex ideas through art.

Conveying Emotions through Texture and Pattern

To convey specific themes or messages in your spray paint art using abstract expressionism, focus on creating textures and patterns that evoke the emotions you want to express. Experiment with layering different colors, blending techniques, and varying levels of opacity to create depth and intensity in your artwork. By incorporating dynamic textures and intricate patterns, you can effectively convey a range of emotions, from tranquility and joy to turmoil and sadness.

Experimenting with Unconventional Techniques

One way to push the boundaries of abstract expressionism in your spray paint art is to experiment with unconventional techniques. Try using different materials like stencils, sponges, or even household items to create unique textures and patterns in your artwork. By exploring new techniques and materials, you can discover innovative ways to express specific themes or messages in your spray paint art.

Expressionism is not limited to traditional tools and methods; by embracing experimentation and pushing the boundaries of what is considered typical in spray paint art, you can create truly impactful and thought-provoking pieces that convey your intended themes or messages with depth and authenticity.

Pop Culture References in Spray Paint Art

Not only is spray paint art a visually stunning form of artistic expression, but it also serves as a powerful medium for conveying specific themes and messages. By incorporating pop culture references into your artwork, you can create pieces that resonate with viewers on a personal and nostalgic level.

Nostalgia and Retro Themes

On your journey to convey specific themes through spray paint art, consider tapping into nostalgia and retro themes. By incorporating iconic images and references from past decades, you can evoke powerful emotions and memories in your audience. Whether it’s a vintage movie poster, a beloved cartoon character, or a retro video game icon, these references can serve as powerful symbols that connect with viewers across generations.

Contemporary Cultural Icons and Symbols

Themes
To add depth and relevance to your spray paint art, consider integrating contemporary cultural icons and symbols into your pieces. References to current trends, popular media figures, or cultural symbols can help your artwork resonate with a modern audience. By incorporating these elements, you can create pieces that feel current and reflective of the world around us. Whether it’s a nod to a trending meme, a tribute to a popular musician, or a commentary on societal issues, these references can add layers of meaning to your artwork.

Personal Expression and Identity

Exploring Individuality through Spray Paint Art

With spray paint art, you have a unique opportunity to explore and express your individuality in a visually captivating way. Whether you choose vibrant colors, intricate designs, or abstract concepts, each piece you create reflects a part of who you are. The freedom and spontaneity of spray paint art allow you to experiment with different styles and techniques, helping you discover and showcase your true artistic identity.

Representing Cultural Heritage and Tradition

With spray paint art, you can pay homage to your cultural heritage and traditions by incorporating symbols, motifs, and colors that are significant to your background. Whether you draw inspiration from ancient art forms, folklore, or modern interpretations of tradition, each piece can serve as a visual representation of your roots and beliefs. By infusing your artwork with elements of your culture, you not only celebrate your identity but also share it with others in a powerful and engaging way.

To further enhance the representation of your cultural heritage and traditions in your spray paint art, consider researching historical references, stories, and symbolic meanings that resonate with your background. By delving deeper into the rich tapestry of your culture, you can create more nuanced and authentic artworks that speak to the essence of who you are and where you come from.
Summing up

From above, you can utilize spray paint art to convey specific themes or messages by carefully choosing colors, symbols, and techniques that align with the message you want to convey. By combining different elements such as stencils, layering, and blending techniques, you can create powerful imagery that resonates with your audience and effectively communicates your intended theme or message. Whether you want to convey a message of hope, resilience, nature, or culture, spray paint art provides a unique and impactful way to express yourself and connect with others through art.

Q: How can spray paint art be used to convey specific themes or messages?

A: Spray paint art can be used to convey specific themes or messages through the use of symbolic imagery, color choices, and composition. Artists can incorporate elements such as nature, spirituality, social issues, or emotions into their work to communicate powerful messages to viewers.

Q: What are some techniques artists use in spray paint art to convey themes or messages?

A: Some techniques artists use in spray paint art to convey themes or messages include layering colors to create depth and texture, using stencils to create intricate designs, and blending colors to evoke different emotions. Artists can also use contrast, shading, and perspective to enhance the impact of their message.

Q: Can spray paint art be used to raise awareness about important issues?

A: Yes, spray paint art can be a powerful tool for raising awareness about important issues such as environmental conservation, social justice, mental health, and more. Artists can use their artwork to provoke thought, spark conversations, and inspire action on pressing issues affecting society.

What are some eco-friendly practices in spray paint art

Over the years, the art world has become increasingly conscious of the environmental impact of its practices. With respect to spray paint art, there are several eco-friendly measures you can take to minimize your carbon footprint. By opting for water-based or low-VOC spray paints, using recycled materials, and properly disposing of chemicals, you can create stunning works of art while also caring for the planet. Let’s explore some sustainable practices that you can incorporate into your spray paint art techniques.

Key Takeaways:

  • Use eco-friendly spray paint: Opt for water-based or low VOC spray paint to reduce harmful emissions and promote better air quality.
  • Repurpose materials: Utilize recycled or repurposed canvases and found objects for your spray paint art to reduce waste and promote sustainability.
  • Clean up responsibly: Properly dispose of empty spray paint cans and packaging, and consider investing in a reusable paint respirator to minimize environmental impact.

Benefits of Eco-Friendly Practices

Reducing Environmental Impact

While practicing eco-friendly spray paint art techniques, you significantly reduce the environmental impact of your artwork. Traditional spray paints contain harmful chemicals that contribute to air and water pollution. By opting for eco-friendly paint options, you are choosing a more sustainable approach that minimizes these negative effects on the environment. Additionally, eco-friendly paints often come in recyclable packaging, further reducing waste.

Improving Health and Safety

Reducing your exposure to toxic chemicals is crucial for your health and safety when creating spray paint art. Practices such as using water-based or low-VOC (volatile organic compound) paints instead of conventional aerosols can greatly improve the air quality in your workspace. These eco-friendly alternatives emit fewer harmful fumes, making the environment safer for you to breathe in while also minimizing the risk of skin irritation or respiratory issues associated with inhaling toxic paint particles.

It is important to prioritize your health and safety while engaging in spray paint art. By choosing eco-friendly practices, you not only protect yourself from potential health risks but also contribute to a cleaner and safer environment for everyone.

Choosing Eco-Friendly Spray Paints

Some eco-friendly practices in spray paint art involve selecting paints that are better for the environment. When choosing spray paints, there are several factors to consider to make your art more sustainable. Here are some tips to help you choose eco-friendly spray paints:

Look for Low-VOC Formulas

On your search for eco-friendly spray paints, one key factor to consider is the VOC (volatile organic compound) content. VOCs are harmful chemicals that can be released into the air and contribute to air pollution. By opting for spray paints with low-VOC formulas, you can reduce your environmental impact and create art with fewer harmful emissions.

Opt for Water-Based Paints

When opting for spray paints, consider choosing water-based formulas over traditional solvent-based ones. Water-based paints have lower VOC levels and are less harmful to both your health and the environment. They also tend to have less odor, making them a more pleasant option for indoor and outdoor use. Water-based paints are easy to clean up with soap and water, reducing the need for harsh chemicals.

Paints What’s more, water-based spray paints come in a wide range of colors and finishes, allowing you to express your creativity while being mindful of the planet. By switching to water-based paints, you can make a positive impact on the environment without compromising the quality of your artwork.

Consider Plant-Based Paints

Look for spray paints made from plant-based ingredients, such as pigments derived from plants like algae or vegetables. These eco-friendly paints are biodegradable and have minimal environmental impact, making them a sustainable choice for your spray paint art projects. Plant-based paints also tend to have lower VOC levels, making them a safer and greener option for both you and the planet.

Choosing plant-based paints for your artwork shows your commitment to sustainability and environmental consciousness. By incorporating these eco-friendly alternatives into your spray paint art, you can create beautiful pieces while reducing your carbon footprint and promoting a healthier planet for everyone.

Preparing Your Workspace

Ventilation and Air Quality

Your health and safety are paramount when engaging in spray paint art. Adequate ventilation in your workspace is crucial to ensure the dispersion of fumes. Always work in a well-ventilated area, such as outdoors or a space with open windows and fans. This will help reduce your exposure to harmful chemicals and maintain good air quality.

Protecting Your Skin and Eyes

Your skin and eyes are sensitive to the chemicals present in spray paint. It’s imperative to wear protective gear such as gloves, long-sleeved clothing, and goggles to shield yourself from potential harm. Additionally, consider using a face mask to prevent inhaling fumes and particles that can irritate your respiratory system.

Another important aspect of protecting your skin and eyes is to wash your hands and any exposed areas thoroughly after completing your artwork. This helps remove any paint residue and reduces the risk of skin irritation or accidental contact with eyes.

Using Reusable Drop Cloths

One eco-friendly practice in spray paint art is using reusable drop cloths to protect your workspace from paint splatters and spills. Instead of disposable options, opt for durable materials like canvas or old sheets that can be easily cleaned and reused for future projects. This not only reduces waste but also saves you money in the long run.

Using reusable drop cloths not only helps in maintaining a cleaner workspace but also contributes to the sustainability of your art practices. By investing in quality materials that can be used repeatedly, you are minimizing your environmental impact and promoting a more eco-conscious approach to your art.

Sustainable Canvas Options

Repurposing Old Materials

Keep in mind that one of the most eco-friendly practices in spray paint art is to repurpose old materials for your canvas. Instead of buying new canvas supplies, look around your house or local thrift stores for old canvases, pieces of wood, cardboard, or even fabric that you can paint on. By reusing these materials, you not only reduce waste but also give a new life to items that would have otherwise been discarded.

Using Recycled Canvas

The use of recycled canvas is another sustainable option for your spray paint art. When purchasing canvas, opt for those made from recycled materials. These canvases are often made from reclaimed cotton or polyester fibers, reducing the environmental impact of producing new canvas materials. Make sure to check the product description or labels to ensure you are choosing a recycled canvas option for your artwork.

The use of recycled canvas not only minimizes the demand for new materials but also contributes to closing the loop on the production and disposal of art supplies. By supporting recycled canvas products, you are promoting a more sustainable art industry overall.

Creating Your Own Canvas from Natural Fibers

It is also possible to create your own canvas from natural fibers for your spray paint art. Options such as hemp, jute, or even recycled paper can be used to make your canvas. By using natural fibers, you are choosing a renewable and biodegradable material for your artwork, reducing the environmental impact of your creative process.

With the increasing popularity of sustainable practices in art-making, many artists are exploring different ways to create their canvases from natural fibers. Experiment with different materials to find the one that best suits your style and preferences while aligning with your eco-friendly values.

Minimizing Waste and Recycling

Reducing Paint Waste

Despite your best efforts, some paint waste is inevitable in the art of spray paint. One way to reduce waste is by planning your artwork in advance and being mindful of the amount of paint you use. Avoid spraying more paint than necessary and try to work in layers to build up colors gradually. By using the right techniques, you can minimize excess paint and create stunning pieces without unnecessary waste.

Recycling Spray Paint Cans

Minimizing waste also means responsibly disposing of empty spray paint cans. One eco-friendly practice is to recycle your empty cans at designated recycling centers or facilities that accept aerosol cans. Recycling helps prevent these cans from ending up in landfills and reduces the environmental impact of your art. Remember to check with your local recycling guidelines to ensure proper disposal.

With recycling, empty spray paint cans can be melted down and used to create new products, reducing the need for raw materials and energy. By taking the extra step to recycle your cans, you not only contribute to a greener planet but also support the circular economy by giving materials a second life.

Repurposing Leftover Paint

With every finished artwork, there may be leftover paint that you don’t want to go to waste. One eco-friendly practice is to repurpose this excess paint for future projects. You can mix leftover colors to create new shades, use them for background layers, or even experiment with different techniques on practice surfaces. By getting creative with your leftover paint, you can minimize waste and expand your artistic possibilities.

Paint can also be repurposed for other DIY projects around your home or studio. From painting furniture to adding color to décor items, leftover spray paint can be a versatile resource for your creative endeavors. By thinking outside the canvas, you can reduce waste, save money on new supplies, and add a personal touch to everyday items.

Creative Techniques for Reducing Waste

Stenciling and Masking

Many eco-friendly practices in spray paint art involve reducing waste while creating beautiful pieces. With stenciling and masking techniques, you can minimize overspray and control where the paint goes. By using stencils made from recycled materials or masking off areas you don’t want to paint, you can cut down on the amount of excess paint that ends up wasted.

Using Multi-Colored Spray Paints

One creative way to reduce waste in your spray paint art is by using multi-colored spray paints. Instead of using multiple cans of single-colored paints, opt for multi-colored spray paints that offer a variety of shades in one can. This not only saves you money and space but also reduces the number of empty cans that end up in landfills.

One popular option is Montana Gold’s Marble Effect spray paint, which contains a combination of colors in one can. This innovative product allows you to create stunning gradients and blends without the need for multiple cans, minimizing waste in the process.

Creating Texture with Natural Materials

Creating texture in your spray paint art can add depth and interest to your pieces. Instead of relying solely on spray paint for texture, consider incorporating natural materials like leaves, twigs, or fabrics into your artwork. By pressing these materials onto the wet paint and then peeling them off, you can create unique textures that are eco-friendly and visually appealing.

To further reduce waste, you can source these natural materials from your surroundings, such as fallen leaves in a park or twigs from your backyard. Not only does this add a personal touch to your art, but it also promotes sustainability by utilizing materials that would otherwise go to waste.

Conclusion

Ultimately, incorporating eco-friendly practices into your spray paint art can help reduce your environmental impact and contribute to a healthier planet. By using water-based or non-toxic paints, choosing recycled or biodegradable surfaces, and properly disposing of waste materials, you can create beautiful art while being conscious of the environment.

Keep in mind, the choices you make as an artist can make a difference in the world around you. By embracing sustainability in your creative process, you can showcase your talent while also promoting a more eco-friendly approach to art. Let your passion for spray paint art inspire others to make environmentally conscious decisions in their own artistic endeavors.

Q: What are some eco-friendly practices in spray paint art?

A: To practice eco-friendly spray paint art, consider using water-based or low-VOC (volatile organic compounds) spray paints instead of traditional aerosol paints. These paints have less harmful chemicals and are better for the environment.

Q: How can I reduce waste while creating spray paint art?

A: To reduce waste, try to use up all the paint in the can before disposing of it properly. You can also repurpose old materials like cardboard or newspaper as canvases for your art to minimize the use of new resources.

Q: Are there any sustainable alternatives to traditional spray paint for art?

A: Yes, there are alternative eco-friendly options such as paint pens, markers, or even natural paints made from ingredients like plant-based dyes. These options are less harmful to the environment and can still create beautiful artwork.

How do you clean and maintain your spray paint equipment

Most painters often overlook the importance of proper maintenance for their spray paint equipment. To ensure your tools last long and perform efficiently, it is crucial to clean them regularly. In this guide, you will learn simple yet effective ways to clean and maintain your spray paint equipment to keep it in top shape for your next project. By following these steps, you can avoid clogs, achieve a smoother finish, and extend the lifespan of your tools. Let’s get started!

Key Takeaways:

  • Clean your equipment regularly: It is important to clean your spray paint equipment after each use to prevent any clogs or build-up that could affect the performance of the equipment.
  • Use appropriate cleaning solutions: Choose the right cleaning solution that is compatible with the type of paint you are using to effectively clean your spray paint equipment without damaging it.
  • Proper storage is key: Store your spray paint equipment in a clean and dry place to prevent any dust or debris from settling on it and causing issues during future use.

Preparing Your Workspace

The key to effectively cleaning and maintaining your spray paint equipment is to start by preparing your workspace. This will help ensure a smooth and efficient process, allowing you to focus on the task at hand without any unnecessary distractions.

Gathering Essential Cleaning Tools

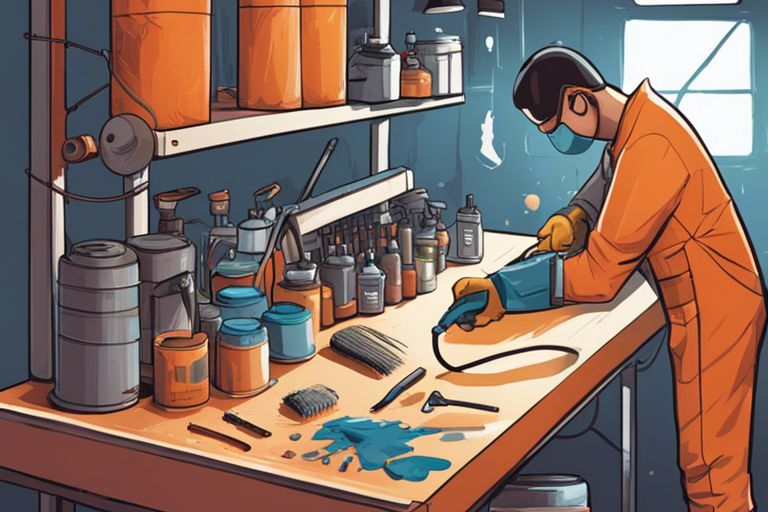
Your first step in preparing your workspace is to gather imperative cleaning tools. These typically include gloves, safety goggles, cleaning cloths, a brush or toothbrush for scrubbing, solvent or paint thinner for cleaning, and a well-ventilated area for working in. Having these tools on hand will make the cleaning process much easier and more efficient.

Protecting Your Work Area from Overspray

Gathering a drop cloth, old newspapers, or a painter’s tarp to cover and protect your work area from overspray is crucial. This simple step will not only prevent paint from getting on surfaces you don’t want it on but also make cleanup much easier once you have finished cleaning your equipment.

It is imperative to establish a designated area for cleaning your spray paint equipment to contain any overspray and prevent it from spreading to other parts of your workspace. This will help maintain a clean and organized work environment.

Disassembling Your Spray Paint Equipment

Some of the most crucial steps in cleaning and maintaining your spray paint equipment involve disassembling various components. By dismantling your equipment properly, you can ensure a thorough cleaning and prevent clogs or malfunctions during future use.

Removing the Nozzle and Cap

Any time you finish using your spray paint equipment, it’s necessary to remove the nozzle and cap carefully. These parts are prone to clogging with dried paint, which can affect the spray pattern and quality of your work. To remove them, unscrew the nozzle and cap gently, making sure not to damage the threads or the sealing components.

Taking Apart the Spray Gun and Hose

Spray guns and hoses also need regular disassembly for proper maintenance. To do this, follow the manufacturer’s instructions provided with your equipment. Taking apart the spray gun allows you to access the internal components for cleaning and lubrication, ensuring smooth operation and prolonging the lifespan of your spray paint equipment.

For hoses, disconnect them from the spray gun and air compressor carefully. Inspect the hose for any signs of wear or damage, such as cracks or leaks. Cleaning the hose regularly will prevent paint build-up, which can affect the spray pressure and overall performance of your equipment.

Cleaning the Nozzle and Cap

Many times, the nozzle and cap of your spray paint equipment can get clogged with dried paint, affecting the spray pattern and overall performance. It is crucial to clean these parts regularly to ensure smooth operation.

Soaking in Solvent

Soaking the nozzle and cap in a solvent solution is an effective way to break down and dissolve any dried paint buildup. Simply remove the nozzle and cap from the spray gun and place them in a container filled with the solvent. Let them soak for a few hours or overnight to loosen the paint residue. After soaking, use a clean cloth or brush to wipe away the dissolved paint before rinsing thoroughly with water.

Brushing Away Debris

On top of soaking, using a small brush to gently scrub the nozzle and cap can help dislodge any stubborn paint particles. Make sure to use a soft-bristled brush to avoid damaging the delicate parts. This method is especially useful for removing any remaining debris after soaking in solvent. After brushing, rinse the parts with water and allow them to dry completely before reattaching to the spray gun.

Cleaning the nozzle and cap of your spray paint equipment is crucial for maintaining its performance and longevity. By regularly soaking in solvent and gently brushing away debris, you can prevent clogs and ensure a smooth spray every time. Make it a habit to clean these parts after each use to prolong the life of your spray paint equipment.

Cleaning the Spray Gun and Hose

To keep your spray gun and hose in top condition, it is crucial to clean them regularly. Proper maintenance will ensure that your equipment functions smoothly and lasts longer. For detailed guidance on how to clean your spray gun and hose effectively, you can refer to the Sprayer Maintenance Tips & Tricks video.

Using a Cleaning Solution

On completion of your painting task, it is crucial to flush out any remaining paint from the spray gun and hose. To do this, you can use a suitable cleaning solution recommended by the manufacturer. Following the manufacturer’s instructions, fill the spray gun’s cup with the cleaning solution, and spray it through the gun until it runs clear. This process will help prevent paint buildup and clogging, keeping your equipment in optimum condition.

Rinsing with Water

Anytime you switch between different colors or finishes, it is advisable to rinse your spray gun and hose with water. This simple step can prevent color contamination and ensure the quality of your paint job. After using a cleaning solution, flush the spray gun and hose with clean water to remove any residue. Ensure thorough rinsing to avoid mixing paint colors inadvertently during your next painting project.

With these regular cleaning practices, you can maintain the performance and longevity of your spray gun and hose, ensuring consistent professional results with every use.

Drying and Reassembling Your Equipment

Air-Drying the Components

Not allowing your spray paint equipment to dry properly can lead to clogs and malfunctions. After cleaning, ensure all the components are completely dry before reassembling the sprayer.

Reassembling: Reattaching the Nozzle and Cap

Reassembling your spray paint equipment is crucial for its functionality. Start by reattaching the nozzle and cap securely to avoid any leaks or issues during your next painting project.

Any

Any loose fittings or improperly attached parts can result in a messy and disappointing painting experience. Taking the time to properly reassemble your spray paint equipment will ensure optimal performance and longevity.

Regular Maintenance Tips

Now that you’ve learned how to clean your spray paint equipment, it’s important to maintain it regularly to ensure smooth operation and longevity. Here are some tips to help you keep your equipment in top shape:

  • Storing Your Equipment Properly: When you’re done using your spray paint equipment, make sure to clean it thoroughly as outlined in the previous sections. Once it’s clean, store it in a cool, dry place away from direct sunlight. This will help prevent rust and corrosion, extending the life of your equipment.

Storing Your Equipment Properly

Storing your spray paint equipment properly is crucial for its longevity. After cleaning your equipment, ensure that it is completely dry before storing it. Moisture can lead to rust and other damage over time. Additionally, consider using covers or cases to protect your equipment from dust and debris while in storage.

Scheduling Regular Cleanings

Properly maintaining your spray paint equipment also involves scheduling regular cleanings. Set aside time at least once a month to give your equipment a thorough cleaning, even if you haven’t used it recently. This will help prevent clogs and ensure that your equipment is always ready for use when you need it.

A regular cleaning routine will not only prolong the life of your spray paint equipment but also help you achieve better results in your projects. By taking care of your equipment, you’ll save time and money in the long run.

Final Words

Taking this into account, maintaining and cleaning your spray paint equipment is crucial to ensure its longevity and performance. By following the simple steps outlined in this guide, you can keep your equipment in top condition and ready for your next project. Note, a little care and maintenance go a long way in preserving your tools and helping you achieve professional results in your painting endeavors.

Q: How often should I clean my spray paint equipment?

A: It is recommended to clean your spray paint equipment after each use to prevent paint build-up and clogs. Regular cleaning will help maintain the performance and longevity of your equipment.

Q: What is the best way to clean spray paint nozzles?

A: To clean spray paint nozzles, you can remove them from the spray gun and soak them in a cleaning solution or paint thinner. Use a small brush to remove any dried paint or debris, then rinse with water and allow to dry before reattaching to the spray gun.

Q: How should I store my spray paint equipment to prolong its life?

A: To prolong the life of your spray paint equipment, make sure to clean it thoroughly after each use and store it in a cool, dry place away from direct sunlight. It is also important to properly lubricate any moving parts and regularly inspect for any signs of wear or damage.

What are the fundamental materials needed for sketching

Many aspiring artists might wonder what basic materials they need to start sketching. You don’t need fancy tools or expensive supplies to begin. All you really need are a few necessary items to unleash your creativity on paper. In this article, we will explore the fundamental materials required for sketching, helping you kickstart your artistic journey without breaking the bank.

Key Takeaways:

  • Paper: An necessary material for sketching as it provides a surface for drawings.
  • Pencils: Different grades of pencils are used for sketching to achieve varying shades and effects.
  • Eraser: A necessary tool to correct mistakes or make adjustments while sketching.

The Essentials

Pencils: The Foundation of Sketching

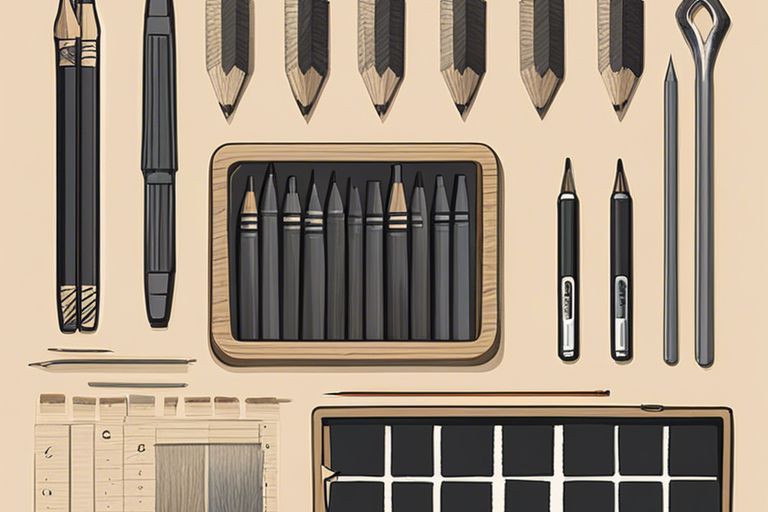
To start sketching, you need a good set of pencils. They are the foundation of your artwork, allowing you to create light sketches or bold outlines. Different pencils have varying levels of hardness, ranging from soft (B) to hard (H). Soft pencils are great for shading and creating darker lines, while hard pencils are ideal for precise details and light lines. Having a range of pencils will give you more flexibility and control over your sketches.

Erasers: Correcting Mistakes and Creating Highlights

On your sketching journey, you will inevitably make mistakes. That’s where erasers come in handy. Not only do they help correct errors, but they are also useful for creating highlights and adding texture to your drawings. There are different types of erasers available, such as kneaded erasers that can be shaped to suit your needs, and precision erasers for fine details. Including a good quality eraser in your sketching kit is imperative for refining your artwork.

The importance of erasers in sketching cannot be overstated. They are not just tools for fixing mistakes but also instruments for adding depth and dimension to your sketches. With the right eraser, you can achieve a level of precision and refinement that truly elevates your artwork. Investing in a variety of erasers will give you the flexibility to experiment and perfect your sketches.

Erasers

When identifying erasers for your sketching kit, consider the type of paper you will be using and the level of detail in your artwork. Soft erasers are gentle on paper and are ideal for light corrections, while vinyl erasers are more durable and suitable for heavier erasing. It’s beneficial to have a mix of erasers in your toolkit to meet different sketching needs. Be mindful of, erasers are not just for fixing mistakes—they are versatile tools that can enhance the overall quality of your sketches.

Paper: The Canvas for Your Creations

Even before you pick up your pencil to start sketching, the type of paper you choose can greatly impact your artwork. The paper serves as the foundation for your creativity, providing texture, weight, and absorbency that can enhance or detract from your final piece.

Types of Paper: Textured, Smooth, and Everything in Between

For the aspiring sketch artist, understanding the different types of paper available is crucial to achieving the desired effect in your sketches. Whether you prefer a rough texture that adds depth to your shading or a smooth surface that allows for precise lines, there is a wide range of paper options to choose from. Here are some common types of paper and their characteristics:

Paper Type Characteristics
Textured Adds depth and dimension to sketches
Smooth Ideal for precise lines and details
Medium Versatile, suitable for various techniques
Heavyweight Durable and can withstand multiple layers of media
Mixed Media Designed to work well with a variety of mediums

Thou, choosing the right paper can elevate your sketches and bring your artistic vision to life.

Sizes and Formats: From Pocket-Sized to Large-Scale

Between the sizes and formats of sketchbook paper, there is a vast array of options to suit your preferences and needs. From pocket-sized sketchpads for on-the-go doodling to large-scale sheets for intricate, detailed drawings, the size and format of your paper can influence the scope and style of your sketches.

Pocket-Sized sketchbooks are convenient for carrying around, allowing you to capture inspiration wherever you go. Whether you prefer to sketch quick outlines or jot down ideas on the fly, a pocket-sized sketchbook fits easily in your bag or pocket, ready for whenever inspiration strikes.

Mark-Making Tools

For any sketching endeavor, mark-making tools are important to bring your ideas to life on paper. Whether you prefer fine lines or bold statements, there are various tools at your disposal to achieve the desired effect.

Pens: Fine Lines and Bold Statements

With pens, you can create intricate details with fine lines or make bold statements with thicker strokes. Fine-tipped pens are great for adding delicate features and textures to your sketches, while thicker markers can help you outline shapes and add emphasis to certain elements. Experimenting with different pen sizes and types can truly elevate the visual impact of your sketches.

Markers: Vibrant Colors and Expressive Strokes

Expressive strokes and vibrant colors can add dimension and depth to your sketches, making them more dynamic and engaging. Markers come in a variety of hues and tip sizes, allowing you to play with different shades and line weights to enhance your artwork. Whether you’re layering colors for a rich effect or creating expressive lines for movement and energy, markers are versatile tools that can help you bring your creative vision to life.

Markers are a popular choice among artists for their ability to blend seamlessly, creating smooth transitions between colors and tones. They are also great for adding pops of color and defining specific areas of your sketch. Investing in a set of quality markers can greatly expand your creative possibilities and help you achieve professional-looking results.

Blending and Shading

After mastering the basics of sketching, you may want to elevate your artwork with blending and shading techniques. These techniques are imperative for creating depth, dimension, and realism in your sketches.

Tortillons: Smudging and Blending Made Easy

An imperative tool for blending and shading in sketching is the tortillon. Tortillons, also known as paper stumps, are tightly rolled paper sticks that are pointed at one end. They are perfect for smudging and blending graphite, charcoal, or pastel to create smooth transitions and gradations in your sketches. Using a tortillon allows you to seamlessly blend different tones and create soft, subtle shading.

Blending Stumps: Creating Soft, Gradual Transitions

Shading is a fundamental aspect of sketching that can greatly impact the overall appearance of your artwork. Blending stumps are cylindrical tools made of compressed paper that are used to blend and soften hard edges in your sketches. By using blending stumps, you can achieve soft, gradual transitions between light and dark areas, adding depth and dimension to your drawings.

The use of blending stumps in your sketching process can help you create realistic textures and subtle variations in tonal values, giving your artwork a more polished and professional look.

Additional Tools for Texture and Interest

Not only do pencils and erasers play a crucial role in sketching, but additional tools can also enhance the texture and interest of your artwork. One such tool is charcoal, known for its ability to add depth and expressiveness to sketches.

Charcoal: Adding Depth and Expressiveness

Interest can be added to your sketches by incorporating charcoal into your toolkit. Charcoal is a versatile drawing tool that allows you to create rich, dark tones, and dynamic textures. By varying the pressure and angle at which you use charcoal, you can add depth and dimension to your artwork, giving it a more expressive and dramatic quality.

Pastels: Soft, Delicate Colors and Textures

On the other hand, pastels offer a different way to introduce soft, delicate colors and textures to your sketches. Pastels come in various forms, including soft pastels, hard pastels, and oil pastels, each providing a unique texture and color intensity. When using pastels, you can easily blend and layer colors to create a smooth and dreamy effect on your sketches.

Pastels are particularly useful for creating vibrant and expressive artwork, with their wide range of colors allowing you to add a pop of color to your sketches. Whether you prefer subtle shades or bold tones, pastels can help you achieve the desired look and feel for your artwork.

The Importance of Erasing and Correcting

Now, in the world of sketching, mistakes are inevitable. That’s why having the right tools for erasing and correcting your work is crucial. Erasers are not just for fixing errors; they also allow you to refine your sketches and bring out the details you envision.

Kneaded Erasers: Shaping and Molding to Perfection

To achieve precision in your corrections, a kneaded eraser is a must-have tool in your sketching kit. Unlike traditional erasers, kneaded erasers can be shaped and molded to suit your needs. Whether you need to erase fine lines or large areas, you can customize the eraser to the shape that best fits the area you want to correct. This flexibility makes kneaded erasers perfect for blending and shading techniques as well.

Electric Erasers: Precise Corrections with Ease

With electric erasers, correcting your sketches becomes a breeze. These handy tools are excellent for erasing precise lines and details without smudging or damaging the paper. Electric erasers are especially useful when working on intricate drawings or when you need to remove stubborn marks. They provide a controlled and consistent erasing experience, allowing you to make corrections with ease and efficiency.

Electric erasers are powered by batteries or electricity, giving them a reliable and consistent erasing performance. Their precision and speed make them a valuable addition to any artist’s toolkit, helping you achieve a polished and professional finish in your sketches.

Conclusion

Summing up, when it comes to sketching, the fundamental materials you need are a sketchbook, pencils (varying in hardness), an eraser, and a sharpener. These basic tools are imperative for any artist, whether you are a beginner or an experienced sketcher. Do not forget, the quality of your materials can greatly impact the outcome of your sketches, so investing in good quality materials can make a significant difference in your work.

So, next time you feel inspired to sketch, make sure you have these fundamental materials on hand. With the right tools and a creative mindset, there are no limits to what you can create on paper. Happy sketching!

FAQ

Q: What are the fundamental materials needed for sketching?

A: The fundamental materials needed for sketching are a sketchbook or paper, pencils (such as graphite pencils or charcoal pencils), eraser, and sharpener.

Q: What type of paper is best for sketching?

A: The best type of paper for sketching is heavyweight paper with a smooth surface, such as Bristol paper or sketch pads specifically designed for drawing.

Q: Are there any additional materials that can enhance sketching?

A: Yes, there are additional materials that can enhance sketching, such as blending stumps for shading, different types of pencils (e.g. colored pencils or conte crayons), ink pens for outlining, and markers for adding color.

How does shading affect the perception of depth in a sketch

There’s a unique magic in the way shading can breathe life into a two-dimensional sketch, creating the illusion of depth and dimension. As you research into the art of shading, you’ll discover how the interplay of light and shadow can trick the eye into perceiving form, distance, and volume in your drawings. By mastering the subtle art of shading, you can elevate your sketches from flat images to captivating works of art that draw the viewer into a world of depth and intricacy.

Key Takeaways:

  • Shading adds dimension: Shading helps create the illusion of depth by adding shadows and highlights to different areas of the sketch.
  • Values impact perception: Darker shades tend to recede, while lighter shades tend to come forward, enhancing the perception of depth in the sketch.
  • Gradual shading creates smooth transitions: Using a gradual transition of shading from light to dark can give a more realistic three-dimensional appearance to the sketch.

The Basics of Shading

Your journey into understanding how shading affects the perception of depth in a sketch starts with mastering the basics of shading. Shading is an vital technique in art that involves adding darkness or lightness to a two-dimensional sketch to create the illusion of three-dimensional form. By using various shading techniques, you can bring your drawings to life and make them visually compelling.

Definition and Types of Shading

The definition of shading Adding darkness or lightness to a sketch to create the illusion of 3D form.
Types of Shading
  • Hatching
  • Cross-hatching
  • Stippling
  • Blending
  • Contour shading
Assume that mastering these shading techniques will enhance the depth and realism of your sketches.

Importance of Shading in Art

An integral part of creating art, shading adds depth, volume, and realism to your drawings. It helps in defining the form, texture, and lighting of an object or a scene. Whether you are drawing a portrait, a still life, or a landscape, mastering the art of shading can significantly elevate the visual impact of your artwork.

Understanding how to manipulate light and shadow through shading techniques allows you to control the focus and mood of your artwork effectively. By strategically shading different areas of your sketch, you can create a sense of depth, perspective, and dimension, making your drawings visually captivating.

The Psychology of Depth Perception

If you have ever wondered how shading affects the perception of depth in a sketch, understanding the psychology behind depth perception can provide some insights. Our brains are remarkable organs that constantly process visual information to help us make sense of the world around us.

How Our Brain Interprets Visual Cues

An crucial aspect of depth perception is how our brain interprets visual cues to understand the three-dimensional world. When you look at a sketch, your brain analyzes various elements such as perspective, size, and texture to create a sense of depth. Shading plays a crucial role in this process by adding gradients of light and dark, which help your brain distinguish between surfaces that are closer or farther away.

The Role of Contrast and Gradation

Interpreting contrast and gradation is key to how our brain perceives depth in a sketch. Contrast refers to the difference in brightness between various parts of an image, while gradation involves smooth transitions between light and dark areas. By observing how shadows are cast and highlights are placed, your brain can infer the shape and position of objects in the sketch.

This intricate dance of light and dark not only adds realism to a drawing but also conveys depth and dimension. Whether you are sketching a simple object or a complex scene, mastering the interplay of contrast and gradation can elevate the perceived depth in your artwork.

Shading Techniques and Their Effects

Hatching and Cross-Hatching

Not only do shading techniques like hatching and cross-hatching add depth and dimension to your sketches, but they also help create texture and form. By using parallel lines (hatching) or crossing lines (cross-hatching) to build up values, you can convey the illusion of light and shadow on your drawing.

Stippling and Pointillism

To achieve depth in your sketches, consider experimenting with stippling and pointillism techniques. By using tiny dots or points closely together or farther apart, you can create gradients and varying tones. This method adds a unique visual effect to your artwork and can enhance the perception of depth and distance in your sketches.

For a more intricate and detailed approach, you can combine stippling and hatching techniques to create rich textures and depth in your sketches. This combination allows you to play with light and shadow in a more controlled and nuanced way, resulting in a visually captivating piece of art.

Atmospheric Perspective and Aerial Shading

Effects

Techniques like atmospheric perspective and aerial shading are crucial for creating the illusion of depth and distance in your sketches. By adjusting the intensity, value, and hue of your shading to simulate how objects appear in the distance, you can effectively convey a sense of spatial relationships in your artwork. This technique is commonly used in landscape drawings to depict vast spaces and atmospheric conditions.

Atmospheric Perspective

Creating Illusions of Depth

Overlapping and Atmospheric Perspective

Perspective can play a significant role in creating depth in your sketches. Overlapping objects can give the illusion of one object being in front of another, creating depth in your composition. Additionally, using atmospheric perspective, where objects in the distance appear hazier and lighter in color, can also enhance the perception of depth in your artwork.

Linear Perspective and Vanishing Points

Overlapping objects can create a sense of depth by showing which objects are in front of others. Linear perspective, on the other hand, involves using converging lines to create the illusion of depth and distance. Understanding vanishing points and how parallel lines appear to converge at a point in the distance can greatly enhance the realism and depth of your sketches.

Linear perspective is a fundamental concept in art that can help you accurately depict objects in three-dimensional space on a two-dimensional surface. By understanding how lines and shapes recede into the distance towards vanishing points, you can create more realistic and convincing drawings.

Shading and Texture

One way to add depth to your sketches is through the use of shading and texture. By incorporating light and dark areas to simulate the play of light on objects, you can create a sense of volume and form. Texture can also enhance the perception of depth by adding detail and complexity to your drawings, making objects appear more realistic and tactile.

Shading and texture are crucial tools for artists looking to create realistic and dimensional drawings. By mastering the techniques of shading to create highlights and shadows, as well as incorporating textures to add depth and interest, you can elevate the quality of your sketches and bring your creations to life.

The Impact of Light Sources

Natural Light and Its Effects

To truly understand the impact of shading on depth perception in a sketch, you must consider the type of light source that is illuminating your subject. Natural light, such as sunlight, creates shadows that are soft and diffused, resulting in gentle transitions between light and dark areas. This can help convey a sense of depth by playing with the contrast between the illuminated areas and the shadows.

Additionally, the angle of natural light can affect how shadows are cast, influencing the perception of depth. By paying attention to these nuances, you can effectively create a three-dimensional effect in your sketches.

Artificial Light and Its Effects

Light plays a crucial role in how shadows are perceived in a sketch. Artificial light sources, such as lamps or overhead lights, can create sharper and more defined shadows compared to natural light. This can add a different dimension to your sketches, emphasizing certain features and creating a more dramatic effect.

Understanding how different light sources affect shading and shadows is imperative for creating realistic and dynamic sketches. Experimenting with various light sources can help you enhance the depth perception in your drawings and bring your subjects to life on paper.

Mixed Lighting and Its Challenges

With mixed lighting sources, such as a combination of natural and artificial light, challenges may arise in shading and depth perception. The interplay between different light temperatures and intensities can create complex shadows that may be difficult to replicate accurately in a sketch.

Lighting conditions can significantly impact the way shadows are cast and how depth is perceived in a sketch. By carefully observing and understanding the effects of mixed lighting, you can overcome these challenges and create compelling drawings that accurately capture depth and dimension.

Balancing Shading and Line Work

The Harmony Between Line and Shade

Many artists often find themselves contemplating the delicate balance between the use of line work and shading in their sketches. It is crucial to understand that both elements play a significant role in creating the perception of depth in your artwork. Line work helps define the outlines and contours of your subject, while shading adds depth, volume, and dimension.

When to Emphasize Lines, When to Emphasize Shade

When approaching your sketch, consider the importance of knowing when to emphasize lines and when to focus on shading. In areas where you want to highlight crisp edges or precise details, such as in facial features or architectural elements, strong line work can be effective. On the other hand, for creating shadows, depth, and a three-dimensional effect, shading plays a crucial role.

Understanding the balance between lines and shading is important. Too much emphasis on either can overpower the other and disrupt the overall harmony of your sketch. Experiment with varying the intensity of both elements to achieve the desired effect and maintain a cohesive composition.

Creating Visual Hierarchy

Between the lines and shading, you can establish a visual hierarchy within your sketch. By strategically applying darker shades and bolder lines to certain areas of your artwork, you can direct the viewer’s focus and create a sense of depth. Consider the light source in your composition and how it affects the distribution of shadows and highlights.

Emphasize the importance of contrast in your artwork – the contrast between light and dark, thick and thin lines, and heavy and soft shading. These contrasts not only add visual interest but also guide the viewer’s eye through the different elements of your sketch, enhancing the overall perception of depth.

To wrap up

Following this exploration of how shading affects the perception of depth in a sketch, you now have a deeper understanding of the important role that light and shadows play in creating a sense of three-dimensionality in your artwork. By mastering the techniques of shading, you can bring your sketches to life by adding depth and volume to your drawings. Bear in mind, shading is not just about filling in the blanks, but rather a tool to evoke realism and drama in your art. If you want to research deeper into the world of shading, you can check out this resource on Light and Shadows in Your Figure Drawings to enhance your skills even further.

Q: How does shading affect the perception of depth in a sketch?

A: Shading is crucial for creating the illusion of depth in a sketch. By using different tones and shadows, artists can give objects a three-dimensional appearance, making them look more realistic and lifelike.

Q: What are some shading techniques that can enhance depth perception in a sketch?

A: Cross-hatching, stippling, blending, and contour shading are popular techniques that artists use to add depth to their sketches. These techniques help create gradients of light and shadow, giving objects form and volume.

Q: How can artists use lighting effects in shading to improve the perception of depth in a sketch?

A: By understanding how light interacts with objects, artists can create realistic shading effects that enhance depth perception in a sketch. Using techniques like chiaroscuro (the contrast between light and dark) and considering the direction of light sources can add realism and depth to a drawing.

Lagaan