Clean

How do you clean and maintain your spray paint equipment

Most painters often overlook the importance of proper maintenance for their spray paint equipment. To ensure your tools last long and perform efficiently, it is crucial to clean them regularly. In this guide, you will learn simple yet effective ways to clean and maintain your spray paint equipment to keep it in top shape for your next project. By following these steps, you can avoid clogs, achieve a smoother finish, and extend the lifespan of your tools. Let’s get started!

Key Takeaways:

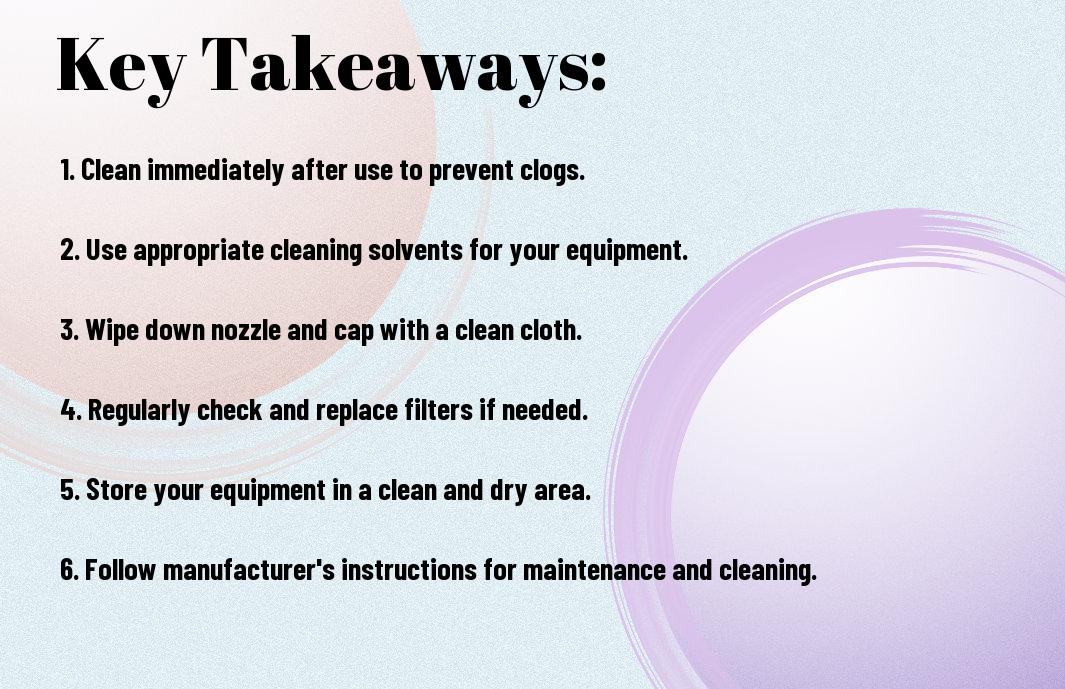
  • Clean your equipment regularly: It is important to clean your spray paint equipment after each use to prevent any clogs or build-up that could affect the performance of the equipment.
  • Use appropriate cleaning solutions: Choose the right cleaning solution that is compatible with the type of paint you are using to effectively clean your spray paint equipment without damaging it.
  • Proper storage is key: Store your spray paint equipment in a clean and dry place to prevent any dust or debris from settling on it and causing issues during future use.

Preparing Your Workspace

The key to effectively cleaning and maintaining your spray paint equipment is to start by preparing your workspace. This will help ensure a smooth and efficient process, allowing you to focus on the task at hand without any unnecessary distractions.

Gathering Essential Cleaning Tools

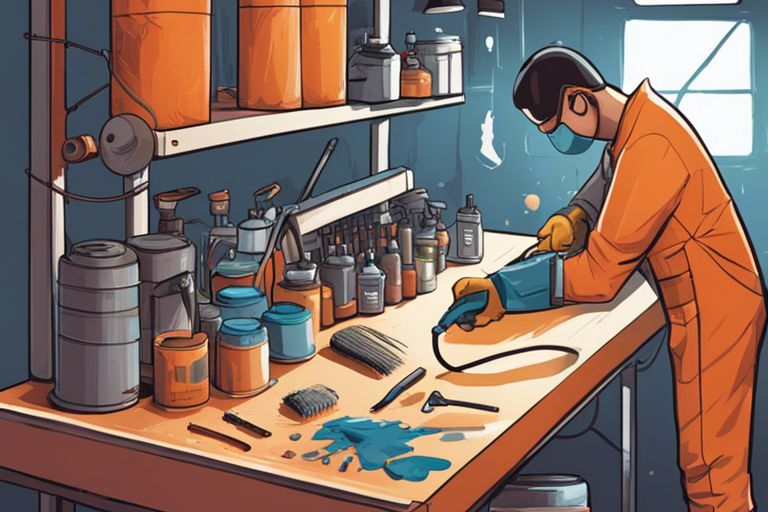
Your first step in preparing your workspace is to gather imperative cleaning tools. These typically include gloves, safety goggles, cleaning cloths, a brush or toothbrush for scrubbing, solvent or paint thinner for cleaning, and a well-ventilated area for working in. Having these tools on hand will make the cleaning process much easier and more efficient.

Protecting Your Work Area from Overspray

Gathering a drop cloth, old newspapers, or a painter’s tarp to cover and protect your work area from overspray is crucial. This simple step will not only prevent paint from getting on surfaces you don’t want it on but also make cleanup much easier once you have finished cleaning your equipment.

It is imperative to establish a designated area for cleaning your spray paint equipment to contain any overspray and prevent it from spreading to other parts of your workspace. This will help maintain a clean and organized work environment.

Disassembling Your Spray Paint Equipment

Some of the most crucial steps in cleaning and maintaining your spray paint equipment involve disassembling various components. By dismantling your equipment properly, you can ensure a thorough cleaning and prevent clogs or malfunctions during future use.

Removing the Nozzle and Cap

Any time you finish using your spray paint equipment, it’s necessary to remove the nozzle and cap carefully. These parts are prone to clogging with dried paint, which can affect the spray pattern and quality of your work. To remove them, unscrew the nozzle and cap gently, making sure not to damage the threads or the sealing components.

Taking Apart the Spray Gun and Hose

Spray guns and hoses also need regular disassembly for proper maintenance. To do this, follow the manufacturer’s instructions provided with your equipment. Taking apart the spray gun allows you to access the internal components for cleaning and lubrication, ensuring smooth operation and prolonging the lifespan of your spray paint equipment.

For hoses, disconnect them from the spray gun and air compressor carefully. Inspect the hose for any signs of wear or damage, such as cracks or leaks. Cleaning the hose regularly will prevent paint build-up, which can affect the spray pressure and overall performance of your equipment.

Cleaning the Nozzle and Cap

Many times, the nozzle and cap of your spray paint equipment can get clogged with dried paint, affecting the spray pattern and overall performance. It is crucial to clean these parts regularly to ensure smooth operation.

Soaking in Solvent

Soaking the nozzle and cap in a solvent solution is an effective way to break down and dissolve any dried paint buildup. Simply remove the nozzle and cap from the spray gun and place them in a container filled with the solvent. Let them soak for a few hours or overnight to loosen the paint residue. After soaking, use a clean cloth or brush to wipe away the dissolved paint before rinsing thoroughly with water.

Brushing Away Debris

On top of soaking, using a small brush to gently scrub the nozzle and cap can help dislodge any stubborn paint particles. Make sure to use a soft-bristled brush to avoid damaging the delicate parts. This method is especially useful for removing any remaining debris after soaking in solvent. After brushing, rinse the parts with water and allow them to dry completely before reattaching to the spray gun.

Cleaning the nozzle and cap of your spray paint equipment is crucial for maintaining its performance and longevity. By regularly soaking in solvent and gently brushing away debris, you can prevent clogs and ensure a smooth spray every time. Make it a habit to clean these parts after each use to prolong the life of your spray paint equipment.

Cleaning the Spray Gun and Hose

To keep your spray gun and hose in top condition, it is crucial to clean them regularly. Proper maintenance will ensure that your equipment functions smoothly and lasts longer. For detailed guidance on how to clean your spray gun and hose effectively, you can refer to the Sprayer Maintenance Tips & Tricks video.

Using a Cleaning Solution

On completion of your painting task, it is crucial to flush out any remaining paint from the spray gun and hose. To do this, you can use a suitable cleaning solution recommended by the manufacturer. Following the manufacturer’s instructions, fill the spray gun’s cup with the cleaning solution, and spray it through the gun until it runs clear. This process will help prevent paint buildup and clogging, keeping your equipment in optimum condition.

Rinsing with Water

Anytime you switch between different colors or finishes, it is advisable to rinse your spray gun and hose with water. This simple step can prevent color contamination and ensure the quality of your paint job. After using a cleaning solution, flush the spray gun and hose with clean water to remove any residue. Ensure thorough rinsing to avoid mixing paint colors inadvertently during your next painting project.

With these regular cleaning practices, you can maintain the performance and longevity of your spray gun and hose, ensuring consistent professional results with every use.

Drying and Reassembling Your Equipment

Air-Drying the Components

Not allowing your spray paint equipment to dry properly can lead to clogs and malfunctions. After cleaning, ensure all the components are completely dry before reassembling the sprayer.

Reassembling: Reattaching the Nozzle and Cap

Reassembling your spray paint equipment is crucial for its functionality. Start by reattaching the nozzle and cap securely to avoid any leaks or issues during your next painting project.

Any

Any loose fittings or improperly attached parts can result in a messy and disappointing painting experience. Taking the time to properly reassemble your spray paint equipment will ensure optimal performance and longevity.

Regular Maintenance Tips

Now that you’ve learned how to clean your spray paint equipment, it’s important to maintain it regularly to ensure smooth operation and longevity. Here are some tips to help you keep your equipment in top shape:

  • Storing Your Equipment Properly: When you’re done using your spray paint equipment, make sure to clean it thoroughly as outlined in the previous sections. Once it’s clean, store it in a cool, dry place away from direct sunlight. This will help prevent rust and corrosion, extending the life of your equipment.

Storing Your Equipment Properly

Storing your spray paint equipment properly is crucial for its longevity. After cleaning your equipment, ensure that it is completely dry before storing it. Moisture can lead to rust and other damage over time. Additionally, consider using covers or cases to protect your equipment from dust and debris while in storage.

Scheduling Regular Cleanings

Properly maintaining your spray paint equipment also involves scheduling regular cleanings. Set aside time at least once a month to give your equipment a thorough cleaning, even if you haven’t used it recently. This will help prevent clogs and ensure that your equipment is always ready for use when you need it.

A regular cleaning routine will not only prolong the life of your spray paint equipment but also help you achieve better results in your projects. By taking care of your equipment, you’ll save time and money in the long run.

Final Words

Taking this into account, maintaining and cleaning your spray paint equipment is crucial to ensure its longevity and performance. By following the simple steps outlined in this guide, you can keep your equipment in top condition and ready for your next project. Note, a little care and maintenance go a long way in preserving your tools and helping you achieve professional results in your painting endeavors.

Q: How often should I clean my spray paint equipment?

A: It is recommended to clean your spray paint equipment after each use to prevent paint build-up and clogs. Regular cleaning will help maintain the performance and longevity of your equipment.

Q: What is the best way to clean spray paint nozzles?

A: To clean spray paint nozzles, you can remove them from the spray gun and soak them in a cleaning solution or paint thinner. Use a small brush to remove any dried paint or debris, then rinse with water and allow to dry before reattaching to the spray gun.

Q: How should I store my spray paint equipment to prolong its life?

A: To prolong the life of your spray paint equipment, make sure to clean it thoroughly after each use and store it in a cool, dry place away from direct sunlight. It is also important to properly lubricate any moving parts and regularly inspect for any signs of wear or damage.

How do you prepare a surface for spray paint art

With spray paint art, preparing the surface is crucial for a successful outcome. Before you unleash your creativity, you must ensure the surface is clean, smooth, and properly primed. This guide will walk you through the steps to prepare your canvas or chosen surface for your spray paint masterpiece. Let’s get started!

Key Takeaways:

  • Clean the surface: Ensure the surface is free of dirt, dust, grease, and other contaminants by cleaning it thoroughly with soap and water.
  • Sand the surface: Use sandpaper to roughen up the surface and create a better bonding surface for the spray paint to adhere to.
  • Prime the surface: Apply a primer to the surface to create a smooth and uniform base for the spray paint, ensuring better adhesion and durability of the paint.

Choosing the Right Surface

The How to Spray Paint guide can be a valuable resource in helping you select the ideal surface for your spray paint art.

Selecting the ideal material

On your quest to find the perfect surface for your spray paint art, consider factors such as durability, porosity, and compatibility with spray paint. Wood, metal, and canvas are popular choices due to their ability to withstand the application of spray paint without warping or deteriorating.

Considering the texture and finish

Choosing a surface with the right texture can significantly impact the final look of your spray paint art. Smooth surfaces will result in a clean and precise finish, while rough textures can add depth and visual interest to your artwork. Additionally, consider the finish of the surface – glossy finishes can enhance the vibrancy of colors, whereas matte finishes can create a more subdued and understated appearance.

Cleaning the Surface

Some of the most important steps in preparing a surface for spray paint art involve cleaning it thoroughly. This ensures that the paint adheres properly and provides a smooth finish.

Removing dirt and grime

Surface preparation begins with the removal of any dirt, dust, or grime that may be present on the surface. Use a mild detergent or soap solution and a sponge or cloth to clean the surface thoroughly. Rinse off the cleaning solution with water and allow the surface to dry completely before proceeding.

Degreasing and de-waxing

dewaxing

A crucial step in the cleaning process is degreasing and de-waxing the surface, especially if you are working on a previously painted surface or one that has been treated with wax. Use a degreaser or a solvent-based cleaner to remove any grease, oil, or wax from the surface. This step ensures that the paint adheres properly and prevents any issues with the finish.

Sanding and Smoothening

Coarse sanding for rough surfaces

To prepare a rough surface for spray paint art, you first need to grab some coarse sandpaper. Sanding rough surfaces helps to even out any imperfections and create a smooth base for painting. Start by gently sanding the surface in a circular motion, focusing on areas with bumps or rough textures. Be sure to wear a mask and protective eyewear to avoid inhaling dust particles.

Fine sanding for a smooth finish

To achieve a smooth finish on your surface, fine sanding is key. After using coarse sandpaper, switch to a finer grit sandpaper to further smoothen the surface. This step is crucial for ensuring that your spray paint art turns out flawless. Lightly sand the surface in a back-and-forth motion until it feels uniformly smooth to the touch.

For a professional-looking result, take your time with the fine sanding process. Pay attention to detail and ensure that the entire surface is smooth and ready for painting. Be mindful of, the smoother the surface, the better the final outcome of your spray paint art.

Removing dust and debris

Understanding the importance of removing dust and debris before painting is crucial. After sanding, use a clean, dry cloth or a tack cloth to wipe down the surface and remove any remaining dust particles. Dust and debris can affect the adhesion of the paint and ruin the overall finish of your artwork, so make sure to thoroughly clean the surfaces before painting.

To prevent any imperfections in your spray paint art, ensure that the surface is completely free of dust and debris. Take your time to clean the area properly, as it will greatly impact the final outcome of your artwork.

Smoothening: Be mindful of, the key to a successful spray paint art piece lies in the preparation of the surface. By sanding and smoothening the surface properly, you set yourself up for a flawless and professional-looking result. Don’t rush this step, as the effort you put into preparing the surface will reflect in the quality of your final artwork.

Priming the Surface

Why primer is important

With spray paint art, priming the surface is important to ensure the paint adheres properly and creates a smooth finish. Primer acts as a base coat that helps the paint stick to the surface, preventing it from peeling or chipping over time. It also helps to seal the surface, providing a uniform texture for the paint to be applied evenly.

Selecting the right primer for your surface

On your journey to prepare the surface for spray paint art, selecting the right primer is crucial. Different surfaces require different types of primers, so it’s important to choose one that is suitable for the material you are working on. For example, if you are painting wood, a wood primer would be the best choice to ensure proper adhesion and longevity of your artwork.

Plus, consider the finish you want to achieve with your spray paint art when selecting a primer. Some primers are specifically designed to enhance the vibrancy of colors, while others may provide a more matte or glossy finish. Make sure to pick a primer that aligns with your artistic vision for the piece.

Applying primer correctly

It is important to apply primer correctly to ensure the best results for your spray paint art. Before applying the primer, make sure the surface is clean and free of any dust, dirt, or debris. Use smooth and even strokes to apply the primer, holding the can at a consistent distance from the surface to prevent drips or uneven coverage. Allow the primer to dry completely according to the manufacturer’s instructions before proceeding with the spray paint application.

Primer is the foundation of your artwork, so take care in applying it correctly to set the stage for a successful and long-lasting spray paint art piece.

Taping and Masking

Choosing the right tape for the job

Choosing the right tape is crucial to achieving crisp lines and preventing paint bleed. When preparing for spray paint art, opt for a painter’s tape that is designed specifically for delicate surfaces. This type of tape is less likely to damage the underlying layers of paint or surface when removed.

Applying tape for crisp lines and edges

Masking off areas with tape is an important step in spray paint art. To ensure clean lines and edges, press the tape firmly onto the surface using your fingers or a putty knife. Make sure the edges are securely attached to prevent any paint from seeping through. When you’re ready to paint, remove the tape carefully and slowly to reveal sharp, precise lines.

The key to achieving professional-looking results with spray paint art is to take your time and pay attention to detail when applying tape for crisp lines and edges. This extra effort will make a significant difference in the final outcome of your artwork.

Masking off areas you don’t want to paint

On some occasions, you may need to mask off areas that you do not want to paint. This could include protecting certain sections of the surface or creating negative space in your artwork. Use tape to outline the areas you want to keep free of paint, ensuring that they remain untouched during the painting process.

To mask off areas you don’t want to paint effectively, take your time to outline the sections precisely with tape. This meticulous step will help you maintain a clean and polished look in your spray paint art.

Preparing the Environment

Setting up a well-ventilated workspace

Not everyone realizes how important it is to have a well-ventilated workspace when working with spray paint. It’s crucial to set up your painting area in a place where there is good air circulation to prevent inhaling harmful fumes. Make sure to open windows and doors or use fans to keep the air moving while you work.

Protecting your surroundings from overspray

Not properly protecting your surroundings can lead to a messy cleanup and potential damage to your property. Cover the area around your workspace with drop cloths, newspapers, or cardboard to catch any overspray. Additionally, consider using a spray booth or a large box to contain the paint particles and prevent them from spreading to areas you don’t want to paint.

A spray booth is a great investment if you plan on doing a lot of spray paint art. It provides a contained space with proper ventilation, making it easier to control overspray and maintain a clean workspace.

Minimizing dust and debris

Dust and debris can ruin the finish of your spray paint art, so it’s vital to minimize their presence in your workspace. Before you start painting, wipe down surfaces with a damp cloth to remove any dust. You can also use a vacuum with a brush attachment to clean the floors and surrounding areas.

Understanding how dust and debris can affect the quality of your artwork will help you take the necessary steps to prevent contamination. By keeping your workspace clean and free of particles, you can ensure a smooth and professional-looking finish to your spray paint art.

Final Check and Preparation

Once again, it is imperative to give your surface a final check before proceeding with spray paint art. Your thorough inspection will ensure a smooth and successful painting process.

Inspecting your surface for imperfections

The first step in making your final check is inspecting your surface for imperfections. The presence of any bumps, scratches, or debris can greatly affect the final outcome of your spray paint art. Take the time to carefully examine the surface and address any imperfections before moving forward.

Making final adjustments before painting

Before starting the actual painting process, it is crucial to make any final adjustments to your surface. This includes ensuring that the surface is clean, dry, and smooth. You may also want to consider using primers or sealants, depending on the type of surface you are working with. Taking these extra steps will help to create a strong foundation for your spray paint art.

Your final adjustments before painting can make a significant difference in the final result of your artwork. By taking the time to prepare your surface properly, you are setting yourself up for a more successful and polished piece of spray paint art.

Summing up

From above, preparing a surface for spray paint art involves a few simple steps to ensure a smooth and lasting finish. By following the instructions outlined in the article, you can create a suitable surface for your artwork, allowing the spray paint to adhere properly and achieve the desired effect. Remember to clean, prime, and sand the surface before beginning your painting to ensure the best results.

Q: What is the first step in preparing a surface for spray paint art?

A: The first step in preparing a surface for spray paint art is to ensure that the surface is clean and free of any dust, dirt, or debris. This can be done by wiping the surface with a damp cloth or using a mild detergent to remove any stains or greasy residues.

Q: How do you smooth out rough surfaces before spray painting?

A: If the surface is rough or has imperfections, you can use sandpaper to smooth it out before spray painting. Start with a coarse sandpaper to remove any bumps or rough patches, then switch to a finer grit sandpaper to create a smooth surface for the paint to adhere to.

Q: Should you prime the surface before spray painting?

A: It is recommended to prime the surface before spray painting, especially if the surface is porous or has a lot of imperfections. Primer helps the paint adhere better to the surface, creates a smoother finish, and can even improve the durability of the paint job. Be sure to choose a primer that is compatible with the type of paint you will be using.

Lagaan