Pencil

What are the fundamental materials needed for sketching

Many aspiring artists might wonder what basic materials they need to start sketching. You don’t need fancy tools or expensive supplies to begin. All you really need are a few necessary items to unleash your creativity on paper. In this article, we will explore the fundamental materials required for sketching, helping you kickstart your artistic journey without breaking the bank.

Key Takeaways:

  • Paper: An necessary material for sketching as it provides a surface for drawings.
  • Pencils: Different grades of pencils are used for sketching to achieve varying shades and effects.
  • Eraser: A necessary tool to correct mistakes or make adjustments while sketching.

The Essentials

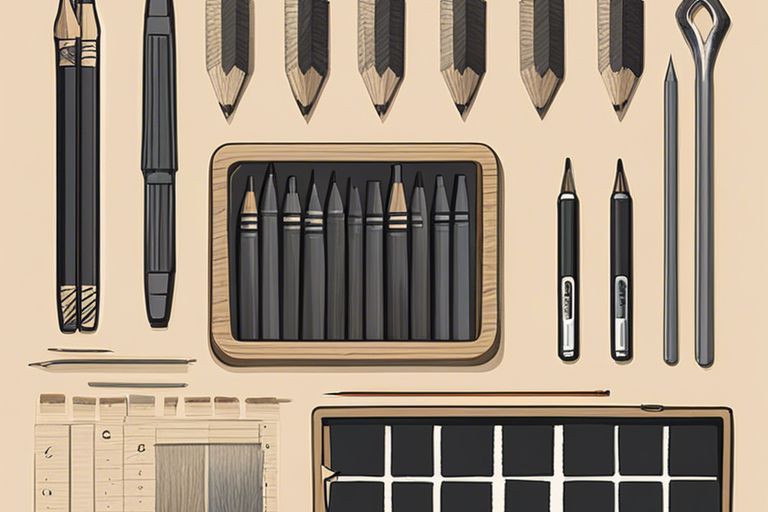
Pencils: The Foundation of Sketching

To start sketching, you need a good set of pencils. They are the foundation of your artwork, allowing you to create light sketches or bold outlines. Different pencils have varying levels of hardness, ranging from soft (B) to hard (H). Soft pencils are great for shading and creating darker lines, while hard pencils are ideal for precise details and light lines. Having a range of pencils will give you more flexibility and control over your sketches.

Erasers: Correcting Mistakes and Creating Highlights

On your sketching journey, you will inevitably make mistakes. That’s where erasers come in handy. Not only do they help correct errors, but they are also useful for creating highlights and adding texture to your drawings. There are different types of erasers available, such as kneaded erasers that can be shaped to suit your needs, and precision erasers for fine details. Including a good quality eraser in your sketching kit is imperative for refining your artwork.

The importance of erasers in sketching cannot be overstated. They are not just tools for fixing mistakes but also instruments for adding depth and dimension to your sketches. With the right eraser, you can achieve a level of precision and refinement that truly elevates your artwork. Investing in a variety of erasers will give you the flexibility to experiment and perfect your sketches.

Erasers

When identifying erasers for your sketching kit, consider the type of paper you will be using and the level of detail in your artwork. Soft erasers are gentle on paper and are ideal for light corrections, while vinyl erasers are more durable and suitable for heavier erasing. It’s beneficial to have a mix of erasers in your toolkit to meet different sketching needs. Be mindful of, erasers are not just for fixing mistakes—they are versatile tools that can enhance the overall quality of your sketches.

Paper: The Canvas for Your Creations

Even before you pick up your pencil to start sketching, the type of paper you choose can greatly impact your artwork. The paper serves as the foundation for your creativity, providing texture, weight, and absorbency that can enhance or detract from your final piece.

Types of Paper: Textured, Smooth, and Everything in Between

For the aspiring sketch artist, understanding the different types of paper available is crucial to achieving the desired effect in your sketches. Whether you prefer a rough texture that adds depth to your shading or a smooth surface that allows for precise lines, there is a wide range of paper options to choose from. Here are some common types of paper and their characteristics:

Paper Type Characteristics
Textured Adds depth and dimension to sketches
Smooth Ideal for precise lines and details
Medium Versatile, suitable for various techniques
Heavyweight Durable and can withstand multiple layers of media
Mixed Media Designed to work well with a variety of mediums

Thou, choosing the right paper can elevate your sketches and bring your artistic vision to life.

Sizes and Formats: From Pocket-Sized to Large-Scale

Between the sizes and formats of sketchbook paper, there is a vast array of options to suit your preferences and needs. From pocket-sized sketchpads for on-the-go doodling to large-scale sheets for intricate, detailed drawings, the size and format of your paper can influence the scope and style of your sketches.

Pocket-Sized sketchbooks are convenient for carrying around, allowing you to capture inspiration wherever you go. Whether you prefer to sketch quick outlines or jot down ideas on the fly, a pocket-sized sketchbook fits easily in your bag or pocket, ready for whenever inspiration strikes.

Mark-Making Tools

For any sketching endeavor, mark-making tools are important to bring your ideas to life on paper. Whether you prefer fine lines or bold statements, there are various tools at your disposal to achieve the desired effect.

Pens: Fine Lines and Bold Statements

With pens, you can create intricate details with fine lines or make bold statements with thicker strokes. Fine-tipped pens are great for adding delicate features and textures to your sketches, while thicker markers can help you outline shapes and add emphasis to certain elements. Experimenting with different pen sizes and types can truly elevate the visual impact of your sketches.

Markers: Vibrant Colors and Expressive Strokes

Expressive strokes and vibrant colors can add dimension and depth to your sketches, making them more dynamic and engaging. Markers come in a variety of hues and tip sizes, allowing you to play with different shades and line weights to enhance your artwork. Whether you’re layering colors for a rich effect or creating expressive lines for movement and energy, markers are versatile tools that can help you bring your creative vision to life.

Markers are a popular choice among artists for their ability to blend seamlessly, creating smooth transitions between colors and tones. They are also great for adding pops of color and defining specific areas of your sketch. Investing in a set of quality markers can greatly expand your creative possibilities and help you achieve professional-looking results.

Blending and Shading

After mastering the basics of sketching, you may want to elevate your artwork with blending and shading techniques. These techniques are imperative for creating depth, dimension, and realism in your sketches.

Tortillons: Smudging and Blending Made Easy

An imperative tool for blending and shading in sketching is the tortillon. Tortillons, also known as paper stumps, are tightly rolled paper sticks that are pointed at one end. They are perfect for smudging and blending graphite, charcoal, or pastel to create smooth transitions and gradations in your sketches. Using a tortillon allows you to seamlessly blend different tones and create soft, subtle shading.

Blending Stumps: Creating Soft, Gradual Transitions

Shading is a fundamental aspect of sketching that can greatly impact the overall appearance of your artwork. Blending stumps are cylindrical tools made of compressed paper that are used to blend and soften hard edges in your sketches. By using blending stumps, you can achieve soft, gradual transitions between light and dark areas, adding depth and dimension to your drawings.

The use of blending stumps in your sketching process can help you create realistic textures and subtle variations in tonal values, giving your artwork a more polished and professional look.

Additional Tools for Texture and Interest

Not only do pencils and erasers play a crucial role in sketching, but additional tools can also enhance the texture and interest of your artwork. One such tool is charcoal, known for its ability to add depth and expressiveness to sketches.

Charcoal: Adding Depth and Expressiveness

Interest can be added to your sketches by incorporating charcoal into your toolkit. Charcoal is a versatile drawing tool that allows you to create rich, dark tones, and dynamic textures. By varying the pressure and angle at which you use charcoal, you can add depth and dimension to your artwork, giving it a more expressive and dramatic quality.

Pastels: Soft, Delicate Colors and Textures

On the other hand, pastels offer a different way to introduce soft, delicate colors and textures to your sketches. Pastels come in various forms, including soft pastels, hard pastels, and oil pastels, each providing a unique texture and color intensity. When using pastels, you can easily blend and layer colors to create a smooth and dreamy effect on your sketches.

Pastels are particularly useful for creating vibrant and expressive artwork, with their wide range of colors allowing you to add a pop of color to your sketches. Whether you prefer subtle shades or bold tones, pastels can help you achieve the desired look and feel for your artwork.

The Importance of Erasing and Correcting

Now, in the world of sketching, mistakes are inevitable. That’s why having the right tools for erasing and correcting your work is crucial. Erasers are not just for fixing errors; they also allow you to refine your sketches and bring out the details you envision.

Kneaded Erasers: Shaping and Molding to Perfection

To achieve precision in your corrections, a kneaded eraser is a must-have tool in your sketching kit. Unlike traditional erasers, kneaded erasers can be shaped and molded to suit your needs. Whether you need to erase fine lines or large areas, you can customize the eraser to the shape that best fits the area you want to correct. This flexibility makes kneaded erasers perfect for blending and shading techniques as well.

Electric Erasers: Precise Corrections with Ease

With electric erasers, correcting your sketches becomes a breeze. These handy tools are excellent for erasing precise lines and details without smudging or damaging the paper. Electric erasers are especially useful when working on intricate drawings or when you need to remove stubborn marks. They provide a controlled and consistent erasing experience, allowing you to make corrections with ease and efficiency.

Electric erasers are powered by batteries or electricity, giving them a reliable and consistent erasing performance. Their precision and speed make them a valuable addition to any artist’s toolkit, helping you achieve a polished and professional finish in your sketches.

Conclusion

Summing up, when it comes to sketching, the fundamental materials you need are a sketchbook, pencils (varying in hardness), an eraser, and a sharpener. These basic tools are imperative for any artist, whether you are a beginner or an experienced sketcher. Do not forget, the quality of your materials can greatly impact the outcome of your sketches, so investing in good quality materials can make a significant difference in your work.

So, next time you feel inspired to sketch, make sure you have these fundamental materials on hand. With the right tools and a creative mindset, there are no limits to what you can create on paper. Happy sketching!

FAQ

Q: What are the fundamental materials needed for sketching?

A: The fundamental materials needed for sketching are a sketchbook or paper, pencils (such as graphite pencils or charcoal pencils), eraser, and sharpener.

Q: What type of paper is best for sketching?

A: The best type of paper for sketching is heavyweight paper with a smooth surface, such as Bristol paper or sketch pads specifically designed for drawing.

Q: Are there any additional materials that can enhance sketching?

A: Yes, there are additional materials that can enhance sketching, such as blending stumps for shading, different types of pencils (e.g. colored pencils or conte crayons), ink pens for outlining, and markers for adding color.

How do you create texture in a sketch

Many artists struggle with adding texture to their sketches. To create depth and interest in your artwork, you can use various techniques such as hatching, cross-hatching, stippling, and scumbling. By experimenting with these methods and adjusting the pressure and direction of your strokes, you can achieve a range of textures that bring your sketches to life. Here are some simple yet effective tips to help you master the art of creating texture in your sketches.

Key Takeaways:

  • Vary your line weight: Using different thicknesses and darkness of lines can create depth and dimension in a sketch.
  • Use cross-hatching: Cross-hatching is a drawing technique where you create texture and shading by layering lines in a crisscross pattern.
  • Add details and shading: Incorporating small details and shading techniques like stippling or scumbling can enhance the texture of your sketch.

Preparing Your Tools

While creating texture in a sketch, it’s important to start by preparing your tools. Selecting the right materials can greatly influence the textures you can achieve in your artwork.

Choosing the Right Sketching Materials

Sketching with different tools can produce various textures in your drawing. Pencils of varying hardness can be used to create light shading or bold lines, while charcoal and graphite sticks can add depth and darkness to your sketches. Experiment with different erasers to achieve highlights and textures in your artwork. Additionally, using textured paper can also enhance the overall look and feel of your drawing.

Experimenting with Different Textures

An important aspect of creating texture in your sketches is experimenting with different techniques. By varying the pressure and angle of your pencil strokes, you can achieve different textures such as hatching, cross-hatching, stippling, or blending. Layering different mediums like watercolor, ink, or pastels can also create unique textures and depth in your artwork. Don’t be afraid to explore and try out new methods to see what works best for you.

Tools such as blending stumps, brushes, sponges, or even your fingers can be used to manipulate the textures in your sketches. These tools can help smudge, blend, or create interesting patterns in your artwork. Note, the key is to play around with different tools and techniques to discover the endless possibilities of texture in your sketches.

Basic Texturing Techniques

Hatching and Cross-Hatching

Any sketch artist can create texture through the use of hatching and cross-hatching techniques. With hatching, you simply draw parallel lines close together to create shading and texture. Cross-hatching involves intersecting sets of parallel lines to build up darker tones and depth in your sketch.

Stippling and Pointillism

With stippling and pointillism, you can add intricate texture to your sketches by using tiny dots or points. By varying the density and spacing of the dots, you can create a range of tones and textures in your artwork.

The technique of stippling involves using dots to create texture, while pointillism is a form of stippling where the dots are applied in a systematic pattern to form images.

Scumbling and Drybrushing

Basic texturing techniques like scumbling and drybrushing are great ways to achieve different effects in your sketches. With scumbling, you can create a soft and blurred texture by lightly dragging your drawing tool across the paper. Drybrushing involves using a brush with very little paint to add a subtle and textured effect to your artwork.

Texturing your sketches with techniques like scumbling and drybrushing can add depth and dimension to your drawings, enhancing the overall visual impact of your artwork.

Creating Depth and Dimension

Despite the flat nature of sketches, you can create the illusion of depth and dimension through various techniques.

Using Value and Contrast

Dimension can be achieved in your sketches through the use of value and contrast. By varying the darkness and lightness of your lines or shading, you can create the illusion of depth. Darker values can push objects further back in space, while lighter values can bring elements forward.

Adding Atmospheric Perspective

One way to give your sketches depth is by incorporating atmospheric perspective. This technique involves making objects in the distance lighter and less detailed, mimicking the natural haze that occurs in the atmosphere. By doing so, you create the sensation of space and distance in your sketch.

Perspective

Suggesting Volume and Form

Volume and form can be suggested in your sketches through the use of hatching and cross-hatching techniques. By strategically placing lines to create shadows and highlights, you can give your drawings a three-dimensional quality. Pay attention to the direction of your lines to suggest the curvature of objects and their interaction with light.

To

Texture can also play a role in suggesting volume and form in your sketches. By varying the texture of different surfaces within your drawing, you can create a sense of tactile quality and depth. Experiment with different mark-making tools to achieve the desired effect and enhance the three-dimensional aspect of your sketches.

Exploring Different Textures

Smooth and Glossy Textures

Now, exploring different textures in your sketches can add depth and interest to your artwork. Smooth and glossy textures can be achieved by using blending techniques with pencils or markers. Start by creating a base layer and gradually build up the shading to create a sleek and polished look. Pay attention to light sources to add dimension to these textures.

Rough and Bumpy Textures

The rough and bumpy textures can add a tactile quality to your sketches. The use of cross-hatching or stippling can create the illusion of rough surfaces like rocks or tree barks. Experiment with varying pressure and spacing between the lines or dots to achieve different levels of roughness. These textures can give your sketches a more detailed and realistic appearance.

The rough and bumpy textures are perfect for adding a touch of realism to your drawings. By layering different types of mark-making techniques, such as hatching or scribbling, you can create a variety of rough textures that mimic the look and feel of various surfaces.

Organic and Natural Textures

With organic and natural textures, such as wood grains or leaves, you can bring a sense of life and vibrancy to your sketches. Experiment with using different types of lines and strokes to create the intricate patterns found in nature. Study the details of plants and objects in real life to capture the essence of organic textures in your artwork.

By combining various drawing techniques like stippling, contour hatching, and scumbling, you can master the art of capturing organic and natural textures. These textures add richness and complexity to your sketches, making them more visually engaging and dynamic.

Glossy

Smooth and glossy textures can be achieved by using blending techniques with pencils or markers. Start by creating a base layer and gradually build up the shading to create a sleek and polished look. Pay attention to light sources to add dimension to these textures.

Advanced Texturing Techniques

After learning the basics of creating texture in your sketches from our previous chapter, it’s time to explore some advanced techniques to take your texturing skills to the next level. To examine deeper into this topic, you can refer to resources like How to Draw Texture.

Blending and Smudging

Smudging and blending are techniques used to create smooth transitions between different areas of texture in your sketch. In the table below, you’ll find a breakdown of these two techniques:

Blending Smudging
Utilizes tools like blending stumps or tortillons Mostly done with your fingers or blending tools
Creates seamless transitions between colors or values Smears graphite or charcoal to soften or blur textures

Glazing and Wash

Blending techniques like glazing and wash involve adding thin translucent layers of color or value over existing textures to create depth and richness. This can be especially effective when working with watercolors or transparent mediums. By using these techniques, you can build up layers of texture and color to enhance the overall look of your sketch.

Impasto and Heavy Texture

Any bold or heavy texture in your sketch can be achieved through impasto techniques, where thick layers of paint or medium are applied with palette knives or brushes. This creates a three-dimensional effect that adds depth and interest to your artwork. Experimenting with impasto can bring a tactile quality to your sketches, making them more dynamic and engaging.

Texture plays a crucial role in adding visual interest and realism to your sketches. By mastering advanced texturing techniques like blending, smudging, glazing, and impasto, you can elevate your artwork to new heights and create captivating pieces that engage the senses and tell a story.

Balancing Texture and Composition

Your sketches can greatly benefit from a careful balance between texture and composition. By understanding how to manipulate texture, you can enhance the overall impact of your artwork.

Visual Hierarchy and Focal Points

The visual hierarchy in your sketch is crucial for guiding the viewer’s eye and creating focal points. By varying the textures in different areas of your sketch, you can establish hierarchy and draw attention to key elements. Use textures sparingly in areas where you want to create contrast or emphasize a focal point.

Harmony and Contrast in Texture

Texture can be used to create harmony and contrast within your sketch. By incorporating a variety of textures that complement each other, you can enhance the overall aesthetics of your artwork. However, be cautious not to overwhelm the composition with conflicting textures that may distract from the main focus.

Harmony in texture involves using textures that work well together to create a cohesive and visually pleasing composition. On the other hand, contrast in texture can add interest and dynamism to your sketch by juxtaposing different textures to create a striking effect.

Negative Space and Restraint

To effectively balance texture in your sketch, consider the importance of negative space and restraint. Negative space can help create breathing room within your composition, allowing the viewer’s eye to rest and appreciate the textures you’ve carefully chosen to highlight.

Understanding when to exercise restraint in texture can be just as crucial as knowing when to add more. By strategically leaving areas with minimal texture, you can create a sense of balance and prevent your sketch from becoming visually overwhelming.

To wrap up

The creation of texture in a sketch is a skill that can greatly enhance the depth and realism of your artwork. By varying your pencil pressure, experimenting with different strokes, and utilizing various tools and techniques, you can add interest and detail to your sketches. Be mindful of, practice is key when it comes to mastering the art of creating texture, so don’t be afraid to experiment and try new things to see what works best for you. Keep honing your skills, and soon you’ll be able to add lifelike texture to your sketches with confidence and flair.

FAQ

Q: How can I create texture in a sketch?

A: To create texture in a sketch, you can use various techniques such as cross-hatching, stippling, blending, and scumbling. These techniques involve using different strokes and marks with your drawing tools to mimic the look and feel of textures in your artwork.

Q: What tools can I use to create texture in a sketch?

A: You can use a variety of tools to create texture in a sketch, including pencils, pens, markers, charcoal, pastels, and brushes. Each tool provides a unique way of applying marks and strokes to the paper, allowing you to achieve different textures in your artwork.

Q: How can I practice creating texture in my sketches?

A: To practice creating texture in your sketches, you can start by experimenting with different marks and strokes using a single drawing tool. Try creating various textures such as wood grain, fur, or fabric by adjusting the pressure, angle, and spacing of your marks. Additionally, studying textures in real life or reference photos can help you understand how to recreate them in your artwork.

Lagaan Skip to content